How to Make Foam Throwing Knives?
Making foam throwing knives
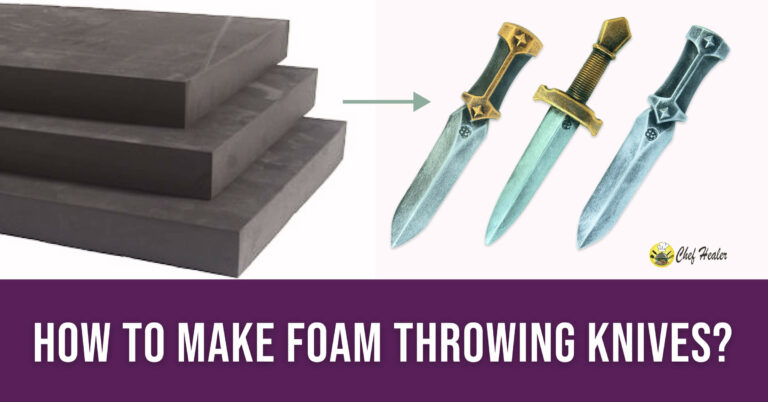
Throwing knives is a fun and exciting hobby, but it can also be dangerous if you don’t have the proper training and equipment. One way to practice your throwing skills safely is by making your own foam throwing knives. Foam throwing knives are much safer than their metal counterparts, as they are soft and flexible and won’t cause any serious injuries if they happen to hit someone. In this tutorial, we will show you how to make your own foam throwing knives using a few simple materials and tools. You’ll be able to customize the size and shape of your foam knives to suit your preference, and with a little bit of practice, you’ll be throwing like a pro in no time!
- Gather materials: foam sheets, scissors, knife template or draw knife shape on paper, hot glue gun, optional: painting supplies
- Cut out knife shape from foam sheet using scissors or knife template
- Hot glue handle onto foam knife shape
- Optional: paint foam knife for added realism
- Test throw foam knife to ensure it is balanced and flies properly
- Enjoy throwing foam knives safely with friends!
- Conclusion
Gather materials: foam sheets, scissors, knife template or draw knife shape on paper, hot glue gun, optional: painting supplies
To get started on your foam throwing knives, the first step is to gather all of the materials you’ll need. You’ll need some foam sheets, which can be found at most craft stores or online. You’ll also need a pair of scissors to cut out the knife shape from the foam. You can either use a knife template or draw the knife shape on a piece of paper and use it as a guide. You’ll also need a hot glue gun to attach the handle to the knife. Finally, if you want to add some realism to your foam throwing knives, you can also gather some painting supplies like acrylic paints and brushes. With all of these materials at hand, you’ll be ready to start making your own foam throwing knives.
Cut out knife shape from foam sheet using scissors or knife template
Once you have all of your materials ready, the next step is to cut out the knife shape from the foam sheet. You can either use a knife template or draw the knife shape onto a piece of paper and use it as a guide. If you’re using a template, simply trace the template onto the foam sheet and cut it out with the scissors. If you’re using a paper guide, place the paper onto the foam sheet and use it as a guide to cut out the knife shape. Be sure to cut out the handle area as well, as this will be where you’ll attach the handle later on. Once you’ve cut out the knife shape, you should have a rough foam knife shape that you can refine and smooth out as needed.
Hot glue handle onto foam knife shape
Now that you have your foam knife shape cut out, it’s time to attach the handle. To do this, you’ll need to use a hot glue gun. First, make sure that your hot glue gun is plugged in and heated up. Then, apply a line of hot glue along the handle area of the foam knife shape. Quickly press the handle onto the glued area, making sure that it is centered and aligned properly. Hold the handle in place for a few seconds to allow the glue to set and secure it in place. You may need to apply more hot glue to the sides of the handle to ensure that it is securely attached to the foam knife shape. Once the handle is attached, you should have a basic foam throwing knife that you can use to practice your throwing skills safely.
Optional: paint foam knife for added realism
If you want to add some realism to your foam throwing knife, you can try painting it. This is an optional step, but it can help to give your foam knife a more realistic look and feel. To paint your foam knife, you’ll need some acrylic paints and brushes. You can find these at most craft stores or online. Choose the colors that you want to use for your knife and have some paper towels or rags on hand to clean your brushes. Then, begin painting your foam knife, starting with the handle and working your way to the blade. Be sure to use thin, even layers of paint and allow each layer to dry completely before adding the next. Once you’ve finished painting your foam knife, you should have a more realistic-looking throwing weapon that you can use to practice your skills safely.
Test throw foam knife to ensure it is balanced and flies properly
Before you start throwing your foam knife, it’s important to test it out to ensure that it is balanced and flies properly. To do this, find a safe and open area where you can throw your knife without hitting anyone or anything. Hold the knife by the handle and throw it gently, using the same technique you would use to throw a regular throwing knife. Pay attention to how the knife flies through the air and see if it spins or wobbles. If the knife is balanced and flies properly, it should spin smoothly and land point-down when thrown. If the knife is unbalanced or doesn’t fly properly, you may need to adjust the handle or blade to achieve the desired balance and flight. Once you’ve tested your foam knife and are satisfied with its performance, you’re ready to start practicing your throwing skills!
If you are still confused making a foam throwing knife you can watch this video on making LARP thrown Weapons by Shane…
Enjoy throwing foam knives safely with friends!
Now that you’ve made your own foam throwing knife and tested it to ensure that it is balanced and flies properly, it’s time to have some fun! Invite some friends over and set up a safe throwing area where you can practice your skills without worrying about causing any injuries. Take turns throwing the foam knives and see who can land the most hits on a target. Remember to always follow proper safety guidelines when throwing any object, including wearing eye protection and staying out of the way of other throwers. With a little bit of practice, you’ll be throwing like a pro in no time! So gather your friends and have some safe, foam throwing fun!
Conclusion
In conclusion, making your own foam throwing knives is a fun and safe way to practice your throwing skills. With just a few simple materials and tools, you can create your own custom foam throwing knives and enjoy hours of safe, foam throwing fun with your friends. Whether you’re a seasoned throwing knife enthusiast or just looking for a new hobby to try, foam throwing knives are a great option. So gather your materials, follow the steps outlined in this tutorial, and get ready to start throwing!
Share your comment :