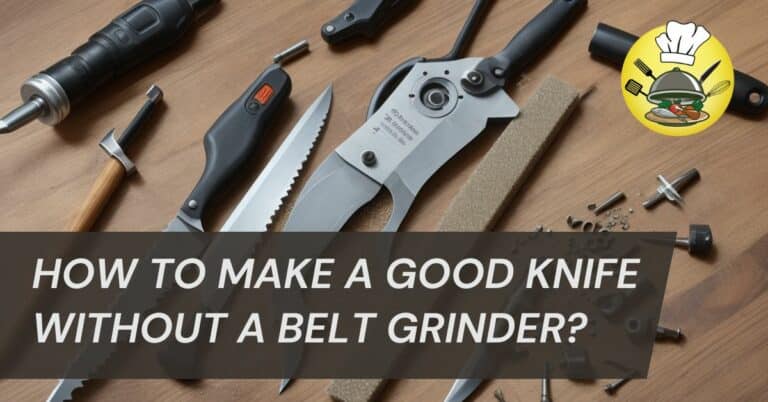
How to Make a Good Knife Without a Belt Grinder?
Introduction to Knife Making
Knife making is a captivating craft that allows enthusiasts to create functional and beautiful cutting tools. While belt grinders are commonly used in the process to shape and finish blades, it’s entirely possible to craft an exceptional knife without one. In this section, we’ll delve into the basics of knife making and discuss why you might opt for alternatives to belt grinders.
The art of knife making encompasses more than just creating a sharp edge. It involves selecting the right steel, designing an ergonomic handle, and understanding the intricacies of heat treatment. Whether you’re a hobbyist or a professional, mastering these fundamental skills is crucial to producing knives that are not only aesthetically pleasing but also highly functional.
By exploring alternative tools and techniques, you’ll gain a deeper appreciation for the craftsmanship behind each blade. This guide will empower you to craft knives that are a testament to your skill and creativity, all without the need for a belt grinder. So, let’s embark on this journey of knife making ingenuity and learn how to create exceptional knives by exploring the world beyond belt grinders.
Alternative Tools and Equipment
While belt grinders are a go-to tool for many knife makers, there are various alternatives available for those who don’t have access to one or prefer to explore different methods. In this section, we’ll explore the alternative tools and equipment you can use to shape and finish your knife effectively.
- Files: Hand files come in various shapes and sizes, making them essential tools for stock removal and shaping. They offer precision and control, allowing you to create intricate designs on your blade.
- Angle Grinder: An angle grinder fitted with abrasive discs or grinding wheels is a versatile choice for shaping and profiling knife blades quickly. It’s essential to exercise caution and practice safe grinding techniques.
- Bench Grinder: While not as versatile as belt grinders, bench grinders can be used for sharpening and initial shaping of the blade. They come in handy for maintaining the edge of your knife.
- Whetstones and Honing Guides: These are essential for sharpening and refining the blade’s edge. Proper sharpening techniques are crucial for achieving a razor-sharp edge.
- Drill Press: A drill press can be used for precision drilling of holes in the handle scales and tang, allowing you to securely attach the handle.
- Sandpaper and Abrasives: Different grits of sandpaper, emery cloth, and abrasive compounds are indispensable for refining the blade’s finish.
By mastering these alternative tools and equipment, you’ll be well-equipped to create quality knives without relying on a belt grinder. Each tool has its advantages and limitations, so it’s essential to understand how to use them effectively to achieve the desired results in your knife-making journey.
Choosing the Right Steel
Selecting the appropriate steel for your knife is a critical aspect of knife making, and it becomes even more crucial when you’re not using a belt grinder for shaping and finishing. The choice of steel significantly influences the knife’s performance, durability, and ease of manipulation.
- Steel Types: Understand the different types of steel available for knife making, such as stainless steel, high carbon steel, tool steel, and Damascus steel. Each has its unique properties and characteristics.
- Properties: Consider the properties you desire in your knife, such as hardness, corrosion resistance, edge retention, and toughness. These properties will dictate the type of steel that best suits your needs.
- Heat Treatment: Knowledge of heat treatment processes is essential, as it affects the steel’s hardness and toughness. Learn about processes like quenching and tempering to achieve the desired blade characteristics.
- Blade Thickness: The thickness of your knife blade can influence its performance. Thinner blades are better suited for slicing and precision work, while thicker blades offer strength and durability.
- Forging vs. Stock Removal: Decide whether you’ll be forging your knife from a steel blank or shaping it through stock removal. The choice may affect the type of steel you use and the shaping techniques you employ.
- Cost Considerations: Keep in mind that some steel types can be more expensive than others. Balance your budget with your desired knife characteristics to make an informed decision.
By understanding the intricacies of steel selection, you can ensure that your knife meets your expectations for performance and longevity, even without the use of a belt grinder. Careful consideration of steel type and proper heat treatment will set the foundation for crafting a high-quality knife.
Designing Your Knife
Designing a knife is a creative and essential aspect of knife making. Even without a belt grinder, you can create a well-designed and functional knife by paying attention to several key elements:
- Blade Shape: Determine the purpose of your knife and choose an appropriate blade shape. Common types include drop point, clip point, tanto, and more. Consider how the blade’s shape affects its intended use.
- Blade Length: Decide on the length of your blade, keeping in mind the practicality and legal restrictions in your area. Longer blades are suitable for chopping and slicing, while shorter ones excel in detail work.
- Tang Type: Select a tang style for your knife, such as a full tang, hidden tang, or partial tang. The tang provides stability and strength to the handle and blade attachment.
- Handle Material: Choose materials for the handle that not only look good but also provide a comfortable and secure grip. Common options include wood, micarta, G-10, and various synthetic materials.
- Bolsters and Guard: Consider adding bolsters or guards to protect your hand from slipping onto the blade and to enhance the knife’s aesthetics.
- Balance and Weight: Strive for a well-balanced knife with a comfortable weight. The balance point should be near the index finger when holding the knife for optimal control.
- Ergonomics: Pay attention to the ergonomics of the handle to ensure it fits comfortably in your hand. A well-designed handle reduces fatigue during extended use.
- Aesthetics: Explore decorative elements such as filework, engraving, or etching to add a personal touch and enhance the knife’s visual appeal.
Creating a thoughtful and functional design lays the foundation for a successful knife-making project. Take your time to plan and sketch your design before you start shaping the blade. Remember that a well-designed knife not only looks great but also performs exceptionally well in its intended tasks.
Preparing the Work Area
Creating a safe and efficient workspace is crucial for knife making, especially when you’re not using a belt grinder. Here’s how to set up your work area for a successful knife-making project:
- Ventilation: Adequate ventilation is essential when working with steel, as it produces fumes and dust. Ensure good airflow in your workspace to prevent inhaling harmful particles. Consider using a respirator mask if needed.
- Lighting: Proper lighting is crucial for precision work. Install bright, focused lighting to illuminate your workspace, allowing you to see details clearly.
- Workbench: A sturdy workbench is the foundation of your workspace. Ensure it’s level and securely anchored to prevent any wobbling or accidents.
- Tool Organization: Keep your tools organized and within reach. A pegboard or toolbox can help you maintain a clutter-free and efficient workspace.
- Safety Gear: Always wear appropriate safety gear, including safety glasses, hearing protection, and gloves. A dust mask or respirator is also necessary for dust and fume protection.
- Fire Safety: Have a fire extinguisher nearby, as there is a risk of sparks when working with metal and power tools.
- First Aid Kit: Keep a well-stocked first aid kit within reach in case of minor injuries.
- Secure Materials: Ensure that materials like steel stock and handle materials are safely stored and won’t cause accidents or injuries.
- Fireproof Surface: If you’re using a grinder or other tools that produce sparks, work on a fireproof surface to prevent fires.
- Emergency Exits: Be aware of the nearest emergency exits and ensure they are accessible and unblocked.
By meticulously preparing your work area and prioritizing safety, you can create a conducive environment for knife making. A well-organized and safe workspace not only enhances the quality of your work but also reduces the risk of accidents during the knife-making process.
Stock Removal Techniques
Stock removal is a crucial step in shaping a knife blade when you don’t have access to a belt grinder. Here, we’ll explore the techniques for effectively removing excess material to create the initial shape of your blade:
- Marking Out: Start by marking the outline of your desired blade shape onto your steel blank. This serves as a guideline to avoid over-removing material.
- Hacksaw: Use a hacksaw to cut close to the marked outline, removing the bulk of the excess material. It’s essential to follow your markings closely to maintain accuracy.
- Files and Rasps: After rough cutting with a hacksaw, use files and rasps to refine the blade’s shape. Different file types, such as flat, round, or triangular, help in shaping and contouring.
- Draw Filing: Draw filing involves pulling the file across the blade’s surface. This technique allows for precision and control, helping you achieve the desired shape.
- Beveling: Use a flat file to create bevels on the blade. Bevels determine the angle of your cutting edge and are vital for the knife’s performance.
- Checking Progress: Periodically check your blade’s progress against your design. This ensures you stay on track and make necessary adjustments as needed.
- Patience and Precision: Stock removal can be time-consuming, but patience and attention to detail are key. Take your time to create a symmetrical and well-shaped blade.
- Safety Measures: Always wear safety gear, including safety glasses and gloves, when using files and rasps, as metal shavings can be sharp and hazardous.
By mastering stock removal techniques, you’ll be able to shape your knife’s blade accurately and efficiently without the need for a belt grinder. It’s a skill that requires practice, but with dedication, you can achieve impressive results in your knife-making journey.
Shaping and Profiling
Once you’ve removed excess material and established the basic shape of your knife, the next step is to refine and profile the blade. In this section, we’ll explore techniques for shaping and profiling your knife without the use of a belt grinder:
- Angle Grinder: If you have an angle grinder, it can be a valuable tool for quickly shaping and profiling the blade. Attach grinding wheels or abrasive discs appropriate for metalwork.
- Hand Sanding Blocks: Hand sanding blocks with abrasive paper are useful for fine-tuning the blade’s curves and contours. This step is critical for achieving a smooth and uniform shape.
- Contouring the Spine: Pay attention to the spine of the blade. Use files, sandpaper, or abrasive blocks to create a comfortable and aesthetically pleasing curve.
- Tapering: Depending on your design, you may want to taper the blade thickness from the spine to the edge. This can be achieved using files and sanding blocks.
- Consistency Checks: Continuously check the blade’s symmetry and proportions as you work. Adjust as needed to ensure your knife maintains its desired shape.
- Edge Bevels: Sharpening your knife’s edge bevels is crucial for its cutting performance. Use sharpening stones or honing guides to establish and maintain the desired edge angles.
- Refining the Tang: Don’t forget to shape and profile the tang if it extends into the handle. This ensures a comfortable grip and a polished look.
- Polishing: As you shape and profile, progressively move to finer grits of sandpaper or polishing compounds to achieve a smooth, mirror-like finish on the blade.
Shaping and profiling require a steady hand, attention to detail, and patience. Regularly assess your progress against your design to ensure the final result meets your expectations. With the right techniques and tools, you can create a beautifully shaped and profiled knife blade without the need for a belt grinder.
Heat Treating
Heat treating is a critical step in knife making that significantly influences the blade’s hardness, durability, and overall performance. Even without a belt grinder, you can achieve proper heat treatment for your knife by following these steps:
- Normalization: Begin by normalizing the blade. Heat it to a critical temperature (around 1,500-1,600°F or 815-870°C) and then allow it to cool in still air. This process relieves internal stresses and prepares the steel for hardening.
- Hardening: Heat the blade evenly to a critical temperature, typically above 1,450°F (788°C), and then quench it in oil, water, or a specialized quenching solution, depending on the type of steel you’re using. This rapid cooling “freezes” the steel’s crystal structure, making it hard but also brittle.
- Tempering: After hardening, the blade is extremely hard but too brittle for practical use. Tempering involves reheating the blade to a specific temperature, which varies depending on the desired hardness and toughness. For most knives, temperatures between 350-450°F (175-232°C) are suitable.
- Edge Testing: To ensure proper hardness, perform an edge hardness test. Carefully use a file to check if the blade retains its hardness. If the file skates across the edge without biting into it, you’ve achieved the desired hardness.
- Cryogenic Treatment (Optional): Some knife makers opt for cryogenic treatment to further enhance the steel’s properties. This involves cooling the blade to extremely low temperatures, typically around -300°F (-184°C), and then slowly allowing it to return to room temperature.
Proper heat treatment is essential for creating a blade that holds a sharp edge and withstands the rigors of cutting tasks. Even without a belt grinder, by following these steps meticulously and understanding the specific requirements of your chosen steel, you can achieve excellent heat treatment results in your knife-making project.
Hand Sanding and Polishing
Hand sanding and polishing are critical steps in achieving a fine finish on your knife, especially when you don’t have access to a belt grinder. Here’s how to master this skill:
- Starting Grit: Begin with a coarse grit sandpaper, around 220-320 grit, to remove any remaining tool marks or imperfections from the shaping and profiling stages.
- Progressive Grits: Gradually move to finer grits, progressing through 400, 600, 800, and up to 2000 or higher. Each finer grit removes the scratches left by the previous one, creating a smoother surface.
- Sanding Blocks: Use sanding blocks or sticks to ensure even pressure and a flat surface while sanding. This helps avoid uneven spots and rounding of edges.
- Changing Directions: Frequently change the direction of your sanding strokes to reveal any remaining scratches. Ensure that all previous grit marks are completely removed before moving to the next grit.
- Inspecting the Finish: Regularly inspect the blade under good lighting to identify any imperfections or areas that require further sanding or polishing.
- Polishing Compound: To achieve a high-gloss finish, apply polishing compounds or abrasive pastes. Use a soft cloth or leather strop to apply and rub the compound onto the blade.
- Final Buffing: Finish the polishing process with a final buff using a clean, soft cloth or felt wheel on a rotary tool. This step enhances the shine and smoothness of your knife.
- Cleaning: After polishing, thoroughly clean the blade to remove any residual polishing compounds or debris. A clean, well-polished surface enhances the knife’s appearance and helps prevent corrosion.
Hand sanding and polishing require patience and attention to detail, but they can result in a stunning, mirror-like finish on your knife. By diligently working through the grits and using polishing compounds, you can achieve a professional look even without a belt grinder.
Handle Attachment and Finishing
The handle of your knife is not only functional but also contributes to its overall aesthetics and ergonomics. Here’s a step-by-step guide on attaching and finishing the handle:
- Handle Materials: Choose handle materials that suit your design and provide a comfortable grip. Common options include wood, micarta, G-10, and various synthetic materials.
- Preparing the Tang: Ensure the tang of your blade is clean and free of debris. It should fit snugly into the handle scales.
- Handle Scales: Cut and shape the handle scales to match the tang of your blade. They should be symmetrical and comfortable to hold.
- Pin Holes: Drill holes in the handle scales for pins or rivets. These pins will secure the handle to the tang and add stability.
- Adhesive: Apply epoxy or another suitable adhesive to the tang and the handle scales. Ensure an even distribution of adhesive for a strong bond.
- Alignment: Carefully align the handle scales with the tang, making sure they fit snugly and match the blade’s profile.
- Pinning: Insert pins or rivets through the holes in the handle scales and tang. These pins add structural integrity to the handle.
- Clamping: Use clamps or a vise to hold the handle scales securely in place while the adhesive cures. Follow the manufacturer’s instructions for curing time.
- Shaping the Handle: Once the adhesive has cured, use files, rasps, and sandpaper to shape and contour the handle for a comfortable and ergonomic grip.
- Finishing Touches: Sand and polish the handle to your desired finish, just like you did with the blade. This enhances the handle’s appearance and feel.
- Protective Finish: Consider applying a protective finish to the handle, such as linseed oil for wood or a protective coating for synthetic materials, to enhance durability and appearance.
By following these steps, you can attach and finish the handle of your knife effectively, ensuring it complements the blade and provides a comfortable and functional grip. A well-crafted handle adds the final touch to your homemade knife, making it not only a useful tool but also a work of art.
Share your comment :